
TL;DR
Web Terms
Although the ability to set up terms and conditions has been available for some time on the web, this release provides the ability to issue terms to students on the web and improves the editing process including the ability to publish terms documents. For details of these changes and how to maintain and issue terms, please see https://www.mydrivetime.co.uk/blog/release-2-9-0/.
Team Terms
Up to now we have only provided access to personal terms i.e., terms created and maintained by an instructor, rather than terms created and maintained by the team, which are available to all members of the team. These team terms can only be maintained by those in the school with administrator rights, including the school owner. Team terms work alongside personal terms.
For details of these changes, read on…
Terms and Conditions Documents
By way of an introduction, Terms and Conditions are provided to clarify what you expect from your students and what they can expect from you. Furthermore, it protects both you and your learners in the unlikely case that there is future disagreement about whether the instructor or student has failed to deliver what was expected of them. As such, you should consider a Terms and Conditions document an absolute necessity for your business and not an optional extra and because it is an essential part of your business, we provide the ability to create, edit and issue documents via the web app.
Team Terms
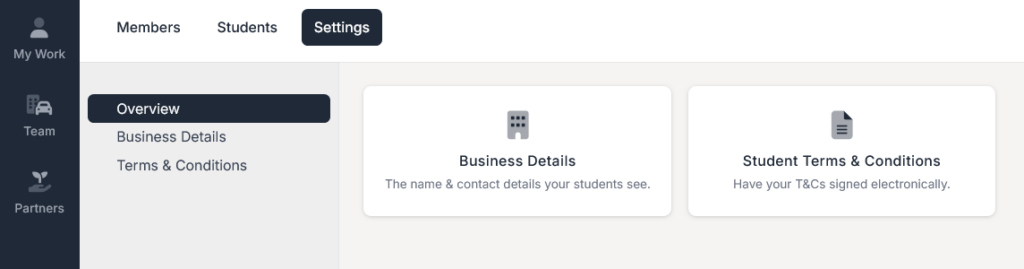
These are available via the Teams Settings option as shown below.
Listing Terms
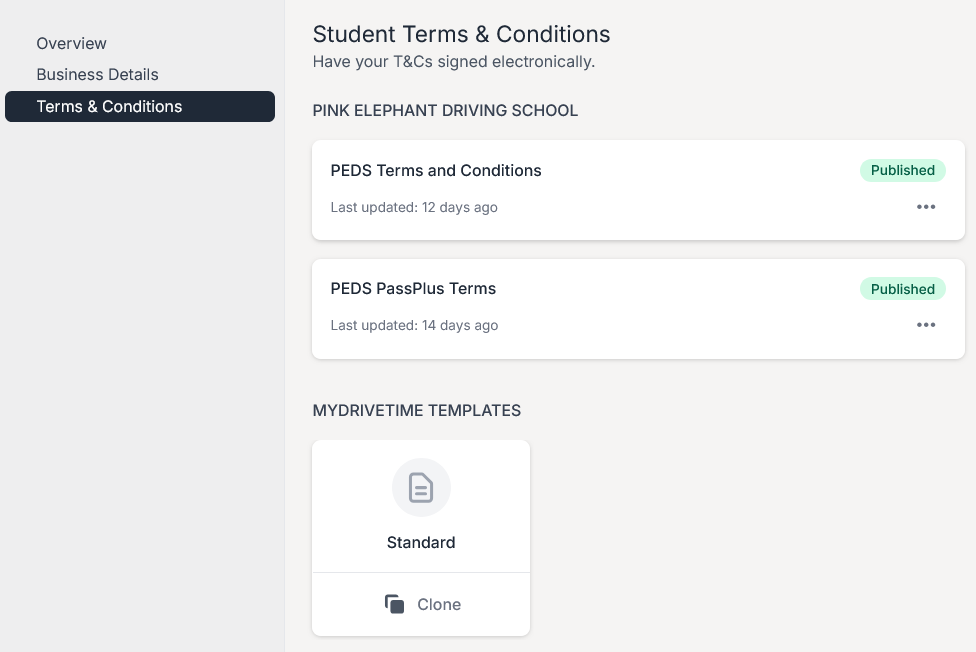
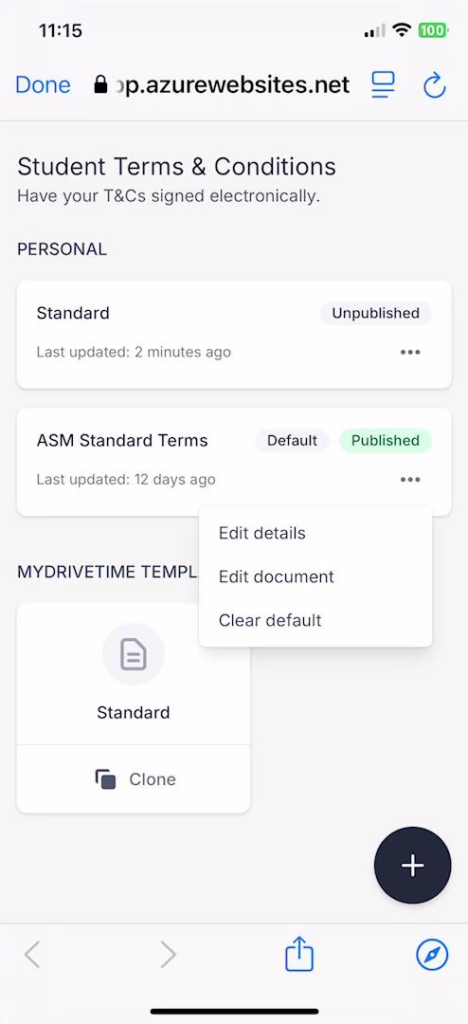
When you access the Student Terms & Conditions feature, you will be presented with a list of all the team terms plus the ability to clone a standard set, provided by MyDriveTime, and add a completely blank set if you wish via the ‘+’ button.
Publishing Terms
The ability to publish terms is critical to a team. Until such time the terms document is published it cannot be issued to students or even read by your team members. You therefore have carte blanche to change the team terms and when you are completely happy you can then make the terms available by publishing them.
When your team issue terms they will have the choice between team terms, published by you, and their own personal terms.
Editing Terms
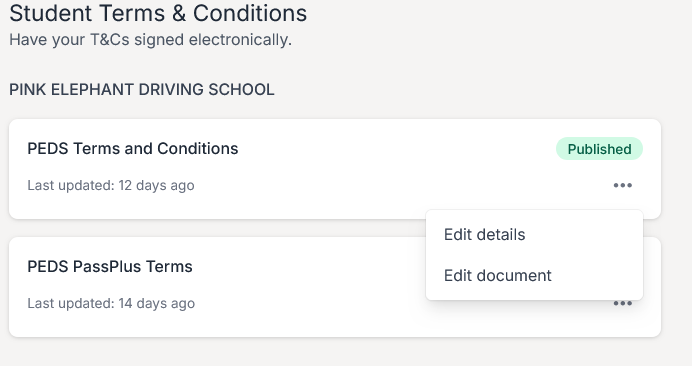
Clicking on the context menu (3 dots to the right of each card), you have 2 options, to edit the details of the team terms and to edit the terms document itself. Note: You cannot specify a terms document to be the default – this is only available to the instructor.
-
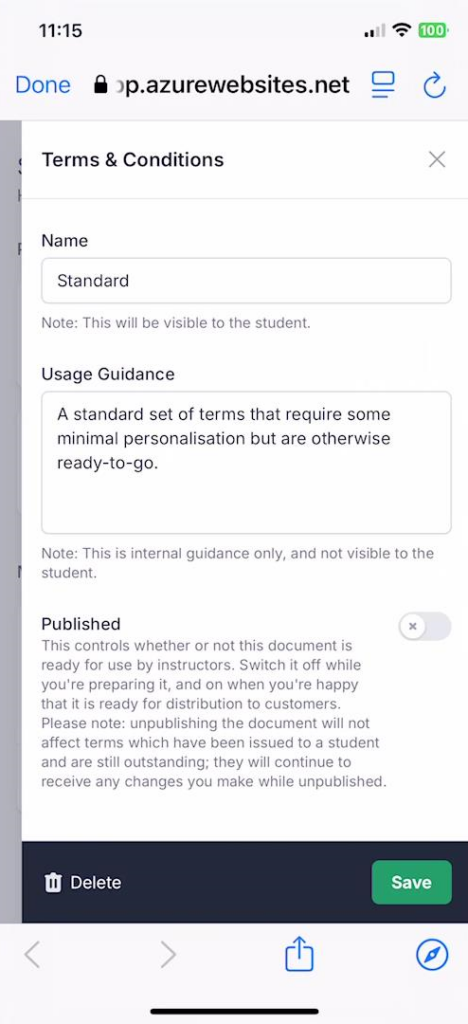
- The first of these options allows you to change the name of the terms, add some usage guidance and make it published.
- The second option allows you to edit the terms document itself.
Edit details
Simply change the details you want to and click ‘Save’.
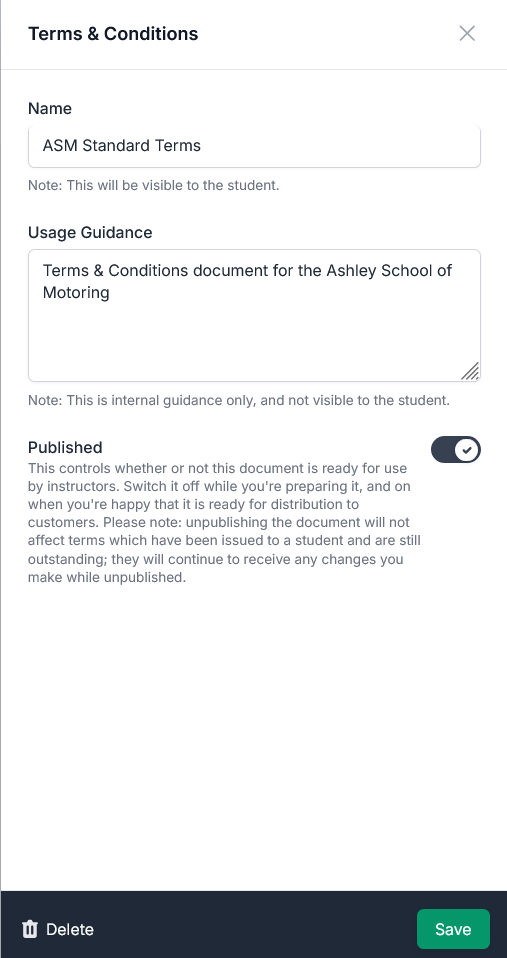
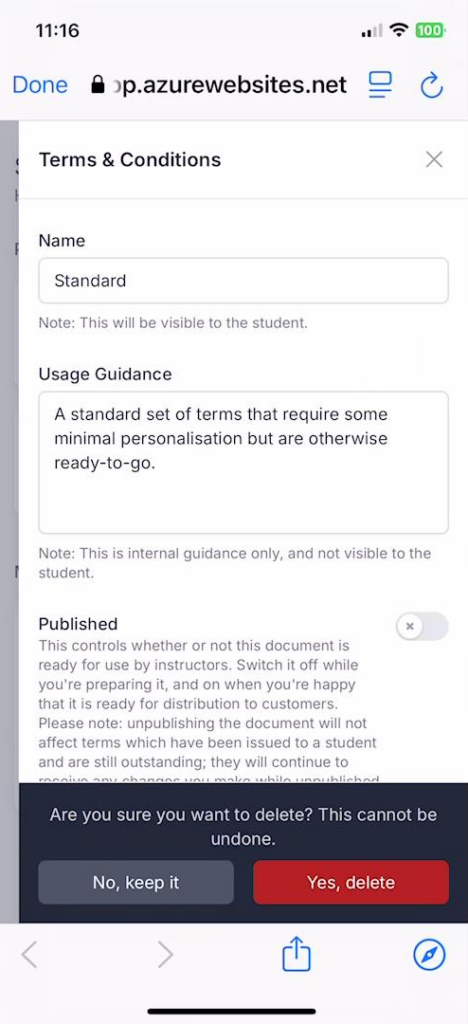
This is also the screen where you can delete documents, by clicking ‘Delete’ and then clicking ‘Confirm’.
Note: Any copies of this document which have been issued but are as yet unsigned will also be deleted; any signed or rejected documents will not.
Edit Document
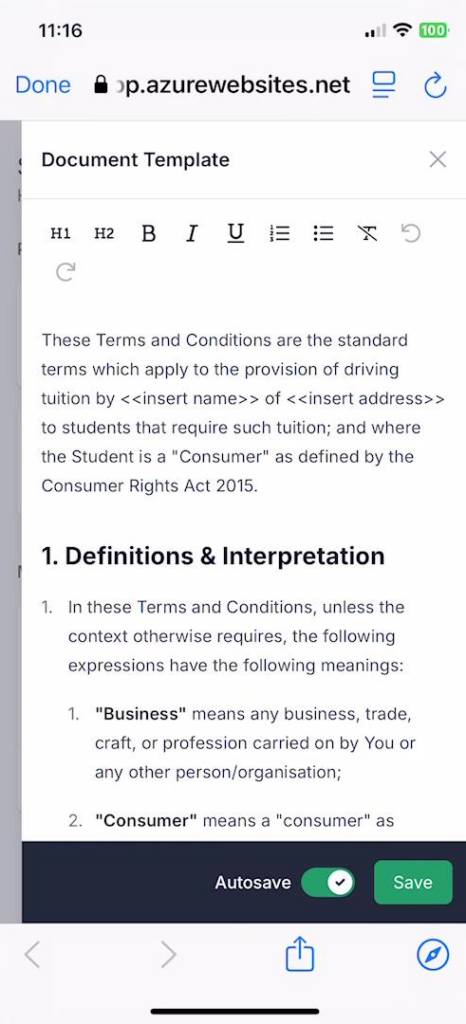
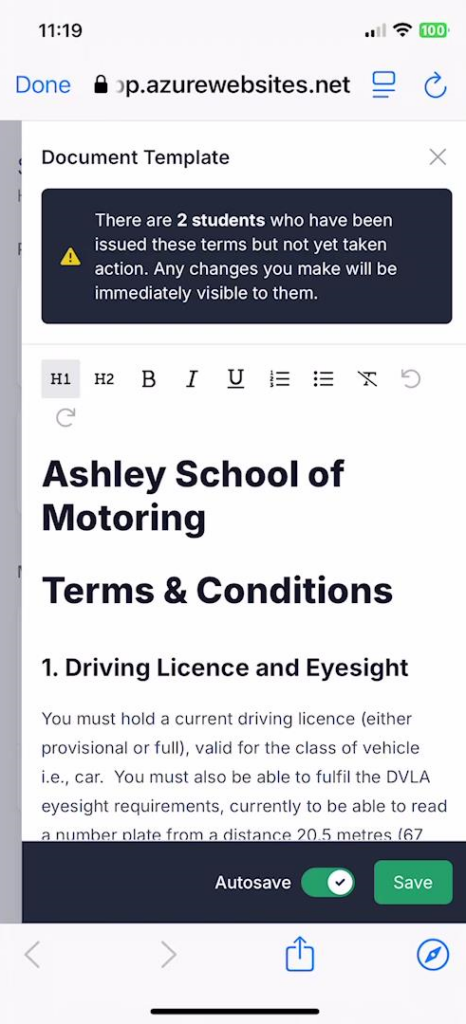
This is where you can change the text in the document itself. The editing process has an Autosave feature, which is on by default, and which will save your document every time you pause when typing (which, if you’re like me is after every letter!). You can turn off Autosave if you wish using the toggle at the bottom of the screen. If you choose to turn it off, you are at risk of losing your document if your device crashes. You need to click ‘Save’ to save your changes to the document.

Editing Team Terms – Additional Considerations
If the document you are editing has previously been issued by members of your team and is, as yet, unsigned by the recipient, any changes you make are automatically and immediately updated to that previously issued copy when the document is saved.
To avoid unintentionally affecting your team’s students you need to exercise considerable care in changing ‘live’ documents. We suggest that you consider creating a new document instead.
If you choose to make changes to ‘live’ documents, we suggest that you turn off Autosave so that the changes will only get propagated through to your team’s students when you save the document at the end of the process. Unpublishing the document does not help in this respect.
To identify whether there are unsigned copies, when you opt to edit the document, a warning will appear telling you how many students will be affected if you make changes.
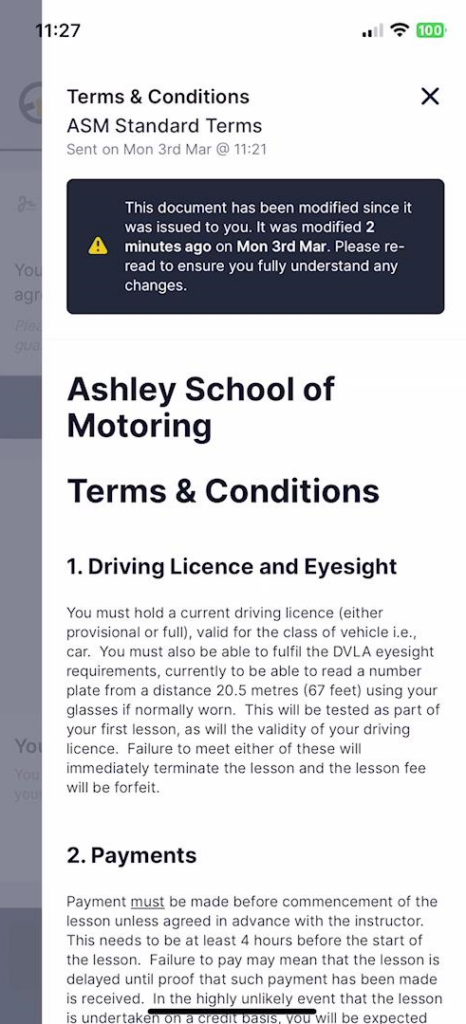
When the student next opens the document to read or sign, they will be warned that the document has changed and that it is recommended that they read it again before signing.
Note: Any changes you make will not be updated to anyone that has already signed or rejected the document.

Issuing Terms
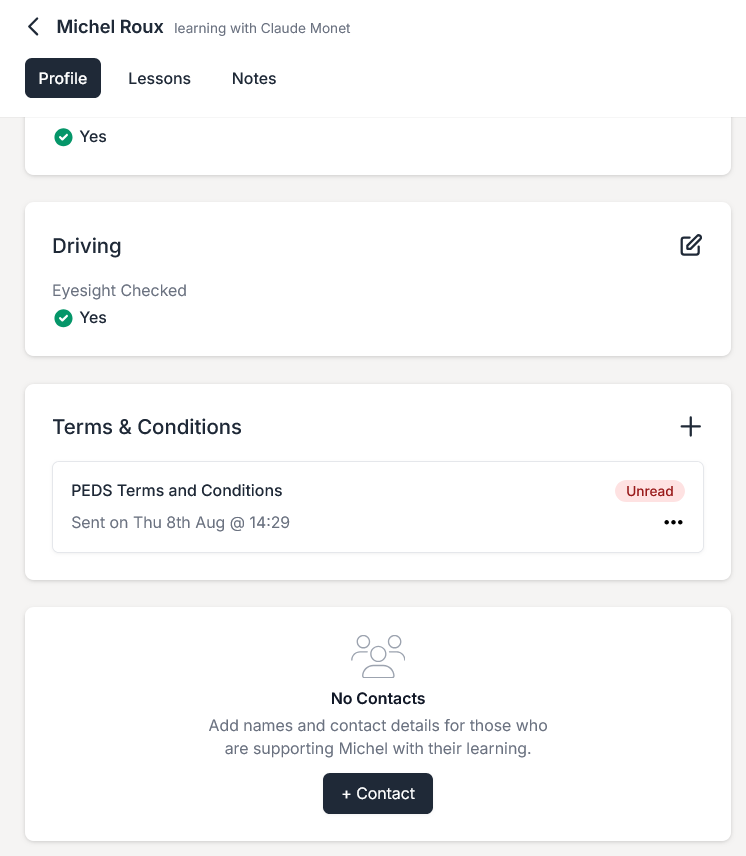
A team member or an administrator can issue terms to a student by going to the student profile page and selecting to add terms as shown below.
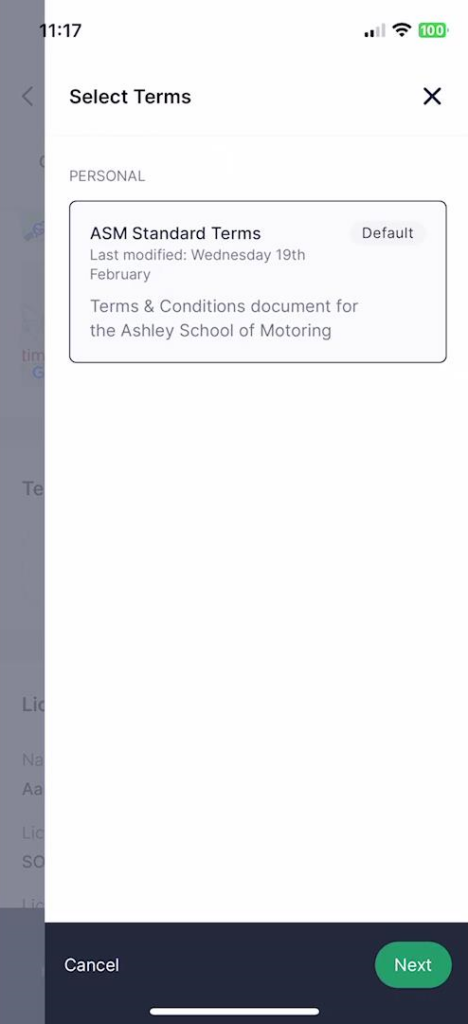
This will show all the available terms available to that instructor, school terms first followed by any personal terms as follows:
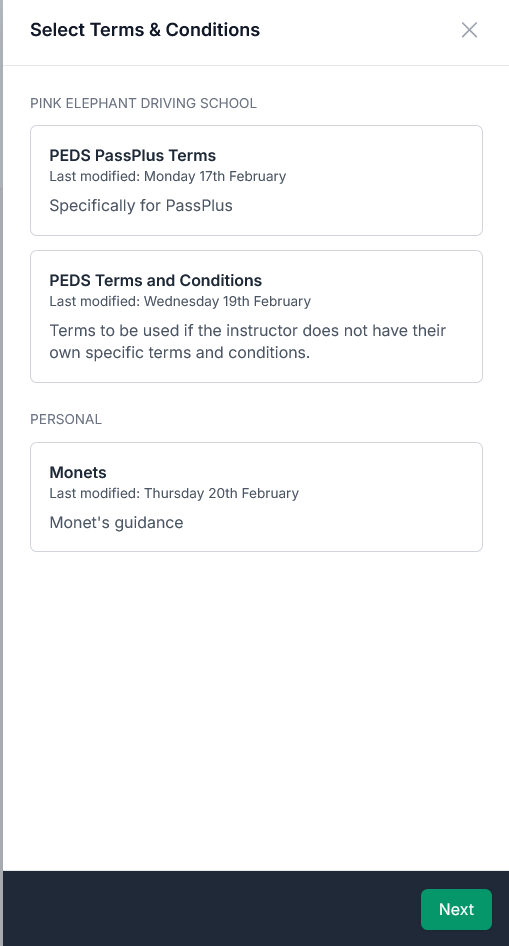
If any particular terms document has been specified as the default terms by the instructor, these will be selected automatically but you can select a different document if you require. Click next to proceed.
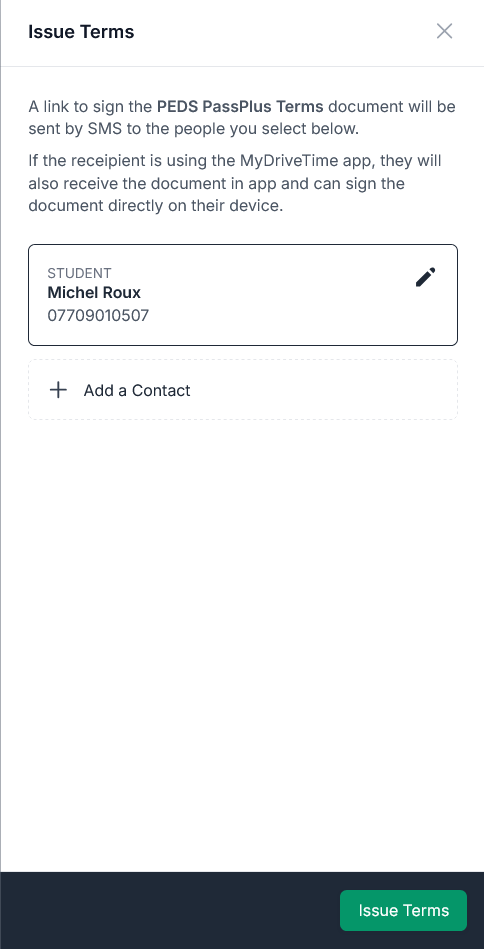
Select the intended recipient and click ‘Issue Terms’. The student will receive notification in the student app, if they have it, that there are terms to be reviewed and signed as well as an SMS with a link to the terms document, which they can use to sign if required.
If you find any issues with this release or anything else, please contact us at support@mydrivetime.co.uk.
TL;DR
This release enhances and expands Terms and Conditions documents to improve the editing process and provide the ability to explicitly publish documents. You can also now issue terms to your students via the web app. Existing documents are not affected.
Terms and Conditions Documents
Terms and Conditions are provided to clarify what you expect from your students and what they can expect from you. Furthermore, it protects both you and your learners in the unlikely case that there is future disagreement about whether the instructor or student has failed to deliver what was expected of them. As such, you should consider a Terms and Conditions document an absolute necessity for your business and not an optional extra and because it is an essential part of your business, we provide the ability to create, edit, issue and sign documents within the app.
Listing Terms
When you access the Student T&C’s feature, you will be presented with a list of all your available Terms plus the ability to clone a standard set of Terms, provided by MyDriveTime, as well as add a completely blank set if you wish via the ‘+’ button.
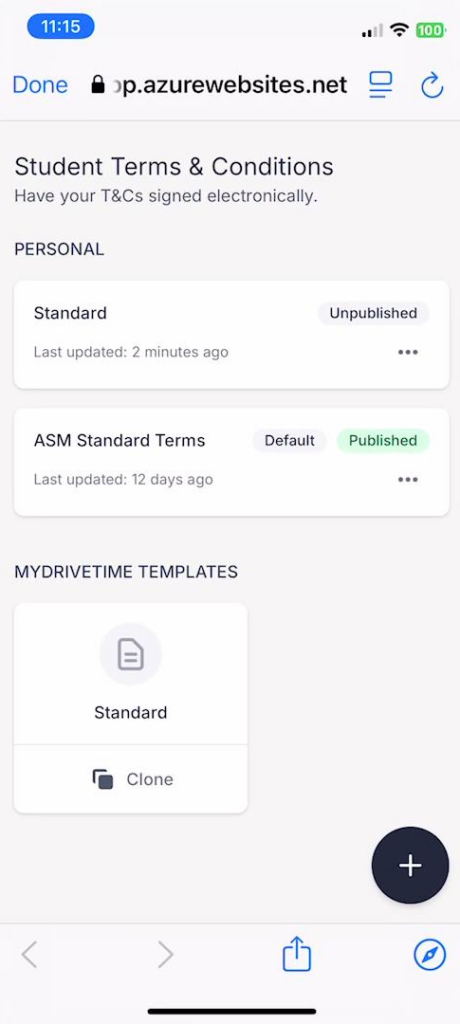
Publishing Terms
The most significant change that we have made is that we have now included the ability to publish Terms. In order to issue a Terms document to a student/parent, it must be published. Indeed, unpublished terms will not even appear on the list that you can select to be sent. In the image above, you will see that I have 2 terms, one of which is already published, and can be issued to students, and another which is as yet unpublished because it is still being worked on and is not yet ready to be sent out.
This enables you to spend time updating your terms, getting them completely ready, before making them available. Once you are satisfied that it says what you want it to say, you can publish it, making it available for sending.
Editing Terms
Clicking on the context menu (3 dots to the right of each card), you have up to 3 options, to edit the details of the terms, to edit the terms document itself and to control whether this set is the default.
-
- The first of these options allows you to change the name of the terms, add some usage guidance and make it published. Here you will also find the option to delete the terms if required.
- The second option allows you to edit the terms document itself i.e., the text.
- The third option allows you to control whether that document is considered to be the default.
-
- If the document is already the default, it allows you to clear the default
- If the document is not already the default, it allows you to make it so – any existing document that is specified as default will lose its default status.
- Note: If a document is unpublished, it cannot be set as the default document.
-
Edit details
Simply change the details you want to and click ‘Save’.
Delete terms
This is also the screen where you can delete documents, by clicking ‘Delete’ and then clicking ‘Confirm’. Note: Any copies of this document which have been issued but are as yet unsigned will also be deleted; any signed or rejected documents will not.
Edit Document
This is where you can change the text in the document itself. The editing process has an Autosave feature, which is on by default, and which will save your document every time you pause when typing (which, if you’re like me is after every letter!). You can turn off Autosave if you wish using the toggle at the bottom of the screen. If you choose to turn it off, you are at risk of losing your document if your device crashes. You need to click ‘Save’ to save your changes to the document.
If the document you are editing has previously been issued and is unsigned, any changes you make are automatically and immediately updated to that previously issued copy when the document is saved. Therefore, if you wish to make wholesale changes we recommend that you turn off Autosave, make all your changes, and then save the document, at which point any issued copies will be updated.
To make this clearer to you, if there are unsigned copies, a warning will appear telling you how many students will be affected if you make changes.
Furthermore, when the student next opens the document to read or sign, they will be warned that the document has changed and that it is recommended that they read it again before signing. Note: Any changes you make will not be updated to anyone that has already signed or rejected the document.
Issuing Terms
You can now issue terms to your students via the web app; the option is under the student profile tab.
The only other change in this area is that when you issue terms, you will only be able to see and select terms documents which have been published.
If you find any issues with this release or anything else, please contact us at support@mydrivetime.co.uk.
TL;DR
This is a web-only release to allow instructors to access lesson details in list form, by student, showing the current status of all lessons as well as the date/time, duration, lesson type, and start and end locations. The release also allows team administrators to do the same for their team’s students.
Lesson List
A new tab, Lessons, has been added to the Student page. Clicking this gives a list of all the lessons, including cancelled lessons, for that specific student in date sequence from the most recent to the oldest as shown below.
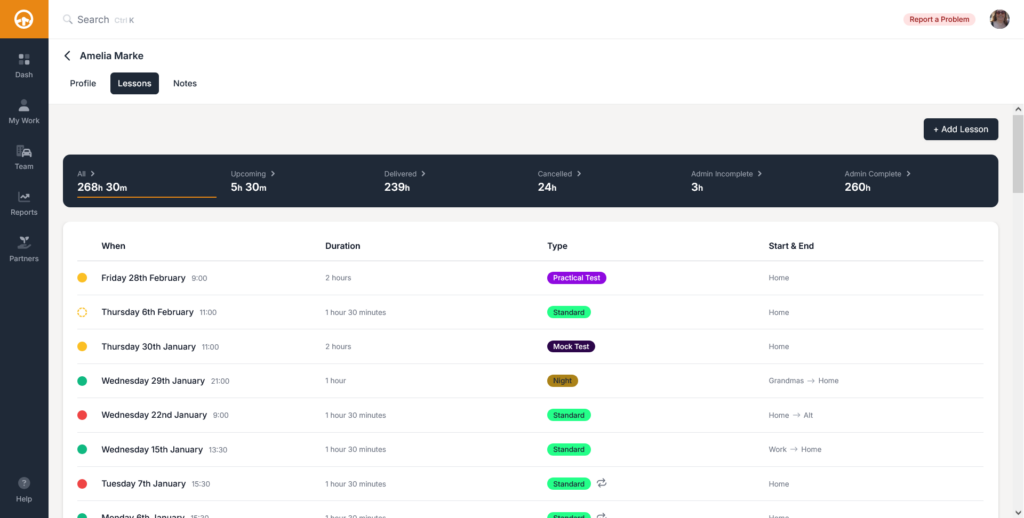
There is the standard ‘At a glance’ box where you can change the lessons that are displayed by category:
| 1 | All Lessons | This is simply a list of all lessons, past, present and future regardless of admin status. |
| 2 | Upcoming Lessons | This is a list of all future lessons for this student. |
| 3 | Delivered Lessons | This is a list of all past lessons for this student. |
| 4 | Cancelled Lessons | This is a list of all cancelled lessons for this student. |
| 5 | Admin Incomplete Lessons | This is a list of delivered lessons where the lesson admin has not been completed i.e., the complete button has not been clicked. |
| 6 | Admin Complete Lessons | This is a list of lessons where the lesson admin has been completed i.e., the complete button has been clicked. Note: This includes cancelled lessons. |
For each lesson entry there is a status symbol matching the colours normally presented on the diary i.e.,
-
- A Green circle means that the lesson is complete (Note: Cancelled lessons are, by their very nature, complete)
- A Yellow circle means that the lesson is upcoming
- A Red circle means that the lesson has been delivered but the admin has not been completed.
A dotted circle, rather than a solid circle, means that the lesson is marked as provisional.
You can click on any lesson to access the details of that lesson, including any notes, tracked journey or summary. This is all explained in the Web Summaries blog here https://www.mydrivetime.co.uk/blog/web-summaries/.
Although this release allows you to access most lesson types, including practical tests, lesson deletions and cancellations can still only be done via the mobile app. These are being worked on and will be added to the web app at the first opportunity. However, we feel that the features included within this release are so good that we wanted you to have them as soon as possible.
Although changes on the mobile app are reflected automatically to the web app and vice versa, you may need to press the browser refresh button or F5 to see the most recent information.
… and finally
This is another significant step in enhancing the web app to provide the facilities both you and we want. However, we haven’t finished yet and there are more changes in the pipeline.
For technical support, to report problems with the app or if you have any questions about this release, please email support@mydrivetime.co.uk.